Arcane Tempest Gun Mage Pistoleers, or ATGM for short, is a signature Cygnar unit on the tabletop. They sport excellent RAT and DEF and have decent SPD as well. Their magical attacks and various ranged abilities combine to make them a highly flexible and unique unit. Lately however there seems to be a trend going away from ATGM. In a way, I can understand why: There are games where they struggle to do anything and they have some rather polarized matchups. Since their UA is pretty much mandatory, that's a lot of points to include in a list that can end up feeling like dead weight.
Personally though I'm not yet sold on the idea that ATGM aren't needed. Perhaps it's because I'm still learning the game and that high-level games play in a way that I haven't yet understood. Perhaps it's due to different metas. Perhaps it's personal preference. Regardless of this, I would like to elaborate on why I find ATGM to be a stellar unit in the right list and one I think twice about before leaving home without.
Strategical Significance
It is my experience that almost without exception, ATGM go to a position where Cygnar does not expect an opponent to throw down heavy resistance. When used successfully, that is. ATGM can help dominate a part of the table but they cannot do so on their own and given insufficient support they'll perish before you can say "feat". I have yet to find out how to deploy them when I go first. I often find them countered too easily when I drop first and indeed my deployment is often exploitable like this. My next few games will see me focus on deployment and I'll write more about this matter later. Anyway, the point is that from the get-go the ATGM are supposed to have a position from which they can ensure control of a part of the table. There is no silver bullet as to how this can be done because the support they need depends on what you're facing. Sometimes Haley can be enough (people tend to underestimate her jam-clearing ability. With Mat6 Pow13 Reach and potentially 9 focus she can easily kill off 2-3 models), sometimes you need something more. Sometimes they are fine on their own. I will refer to this part in the examples later.
No-Go Counters
While ATGM are very flexible, there are some things out there that they can't deal with effectively. I've often found myself overestimating them based on their amazing displays in previous games only to throw their shots away at something they're not supposed to be targeting. I've learned this lesson the hard way: With only 7 shots you simply cannot afford to waste them on targets they are inefficient against. Typically this is high-arm stuff when you can't afford to deadeye them for crit brutal and you don't have Aiyana. I had a game recently where I waste 2 full rounds of their shooting trying to spike against Cryx cavalry. In a nutshell that cost me the game. Learn to identify what they cannot deal with and make sure you find better targets for them. With essentially a 20" threat range that should definitely be doable.
Leveraging The ATGM Threat Projection
Cygnar is universally known for being one of the very best factions in the name for removing key models at a distance with relative ease. ATGM excel at taking out support solos in particular and other elite units such as Mage Hunter Strike Force. Frequently when facing inexperienced opponents you will be able to land devastating blows early on against these targets but as soon as people get some experience with them, they'll learn to keep their cool and make sure they stay away. At this point, a new game evolves and luckily, we have multiple ways to take advantage of this. For example I find Eiryss2 a very frequent solo to fear ATGM. When facing Haley2 she will almost always want to shoot Thorn because shooting Thorn means no channels for a turn. By keeping Thorn close enough to your ATGM so that Eiryss risks her own life if she wants to land that disruption your opponent will have a hard time evaluating whether to go for said shot or not. I did a variant of this in my last tournament game at Challenge where I put Thorn in front of B13th, tempting Eiryss to target me which she did, even though I was DEF17 (Deceleration + hill). In my ensuing turn I put Deadeye on the Black 13th and Lynch killed Eiryss.
Another example of leveraging their threat projection was a game I had vs Menoth where the Avatar of Menoth activated his "advance to me!" ability (so much for looking up the name). I put the ATGM up on a line and started Thunderbolting him away like a row of dominos until he ended up right in front of my Stormwall which just so happened to have 3 focus to kill him with. Thunderbolt is in my opinion the bread and butter of ATGM, perhaps even rivalling Snipe for their most useful attack type. More on this later.
A trick I frequently use with Haley is to cast TK or even Temporal Acceleration on ATGM. Most opponents know the core numbers of deployment (link), the threat range of ATGM and will move accordingly to avoid them. TK + TA + Deadeye is a serious investment in terms of focus but if that means you can take down 2 Druids of Orboros who thought they were safe for example then it might just be worth it. Not always, but definitely sometimes a thing to keep in mind. Getting +2" or even +4" (if you target the same model with both spells) can dramatically alter the state of the game.
Ok, so we've discussed the basics: How to use them successfully from a very high-level perspective, how to make sure their points aren't wasted and how to take advantage of the strengths they provide. Time to look at some in-game examples! I will start with the ability I use the least, but which is still an important part of their toolbox:
Critical Brutal Damage (Crit Brutal)
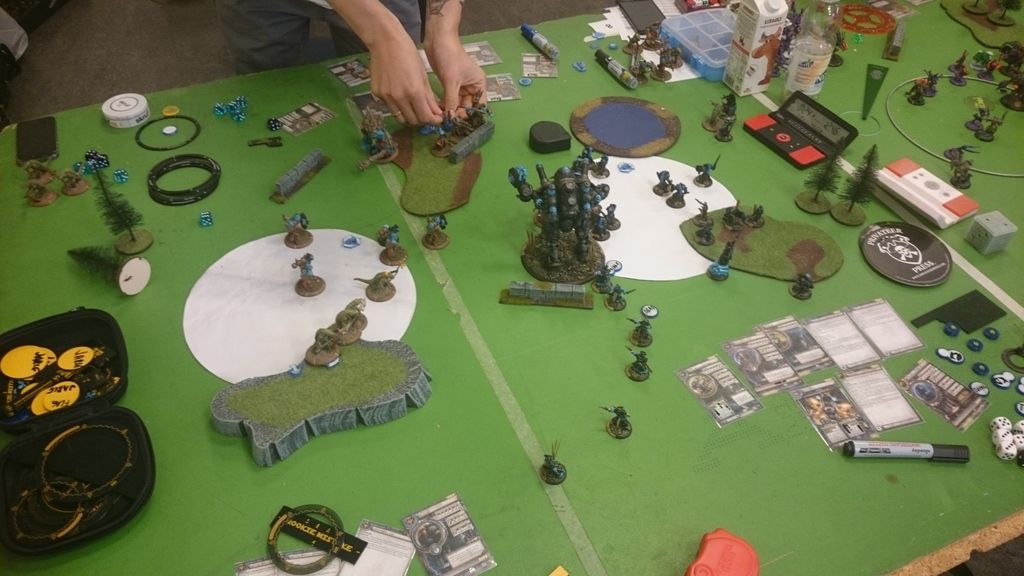
In this first example I am playing against Asphyxious2. He has run a ton of models up to a central point of the map (the scenario is Close Quarters) to force Haley to consider her options and make sure killbox is a real threat.
The problem with shooting Pow10 vs ARM15-16 is that you are relying too much on dice. I've had games where I've hit 5 ARM16 models and dealt 0 wounds. Dice are tricky. In this situation, I need to claim the middle and since gaspy hasn't feated I need to kill just about everyone to be safe. By casting deadeye and moving up aggressively I can Crit Brutal to more reliably clear them off (critical is about 40% on 3d6. I will run some numbers later depending on the DEF you face and expand the Core Numbers page). After I did that the Stormwall went in and cleared the rest. Despite Gaspy having his feat intact, I'd say the situation was looking good for Cygnar:
Notice also how I keep the ATGM in a part of the table where they are able to control their area with sufficient support and no jams.
---
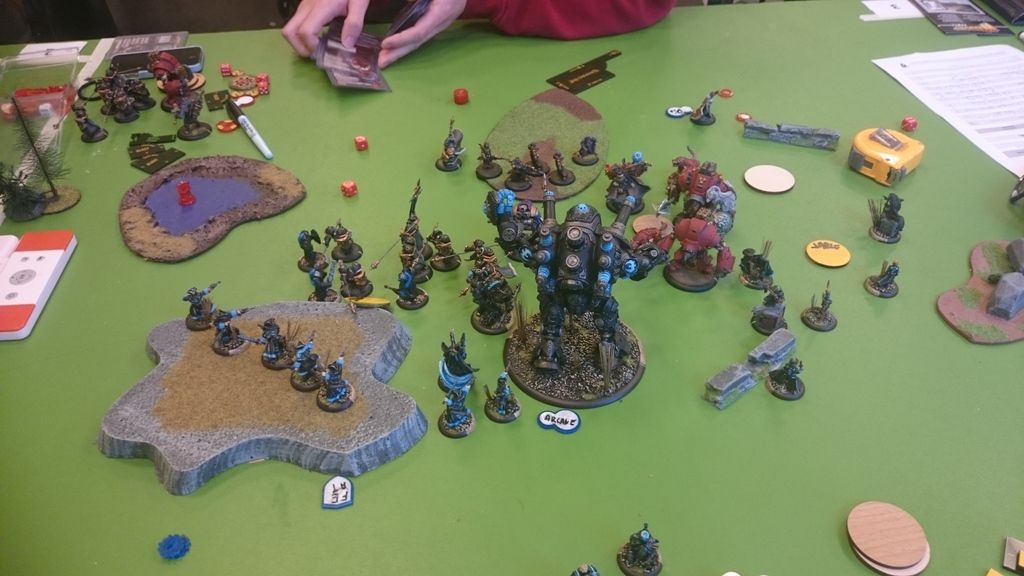
The next example features a game against Vayl2 in Close Quarters. Against Legion i often find that ATGM shine in a central position: The combination of seriously damaging Angelii with Crit Brutal and pushing back with Thunderbolt is enough to basically win the middle on its own.
What happened was that my opponent tried to force his way into the middle with the Angelii. I deadeye'd the ATGM, feated and started throwing out crit brutals. When they don't crit they deal an average of roughly 1 damage (Pow10 vs ARM17 averages 1.1 or something. I'll run the numbers for Pow10 vs ARMX and put them up as some of these are quite surprising due to the nature of spikes) which is ineffective, but with a ~40% chance to crit brutal their total damage output becomes something the Legion player has to respect. In this particular game I killed off almost all the beasts but a lucky Ravagore surviving free strikes and having 4 boxes left (all aspects with at least 1 each) managed to land a shot and kill Haley outright. My bad and one of the many reasons I wrote this. Regardless the ATGM performed as expected and were vital to taking down the Angelii in the middle.
---
The next example is from a game of Recon vs Deneghra1. Due to a stupid mistake with covering fire placement I lost the Stormwall in the previous turn. I was slowly losing the attrition game as Thorn was also about to die. ATGM were in a position to seriously put some hurt on Deneghra:
 |
| Some of the ATGM are just "below" the edge of the picture |
Lastly it should be noted that outside of deadeye or similar buffs to give them +1 dice, Crit Brutal is just a long shot for when you don't need any other abilities and Arcane Inferno is irrelevant.
Ok, let's move on to one of their signature attack types:
Snipe
I'll start with a simple example. Sometimes when people don't play vs ATGM or haven't seen them in a long time they forget how far they threaten and how easily they kill elites and solos.
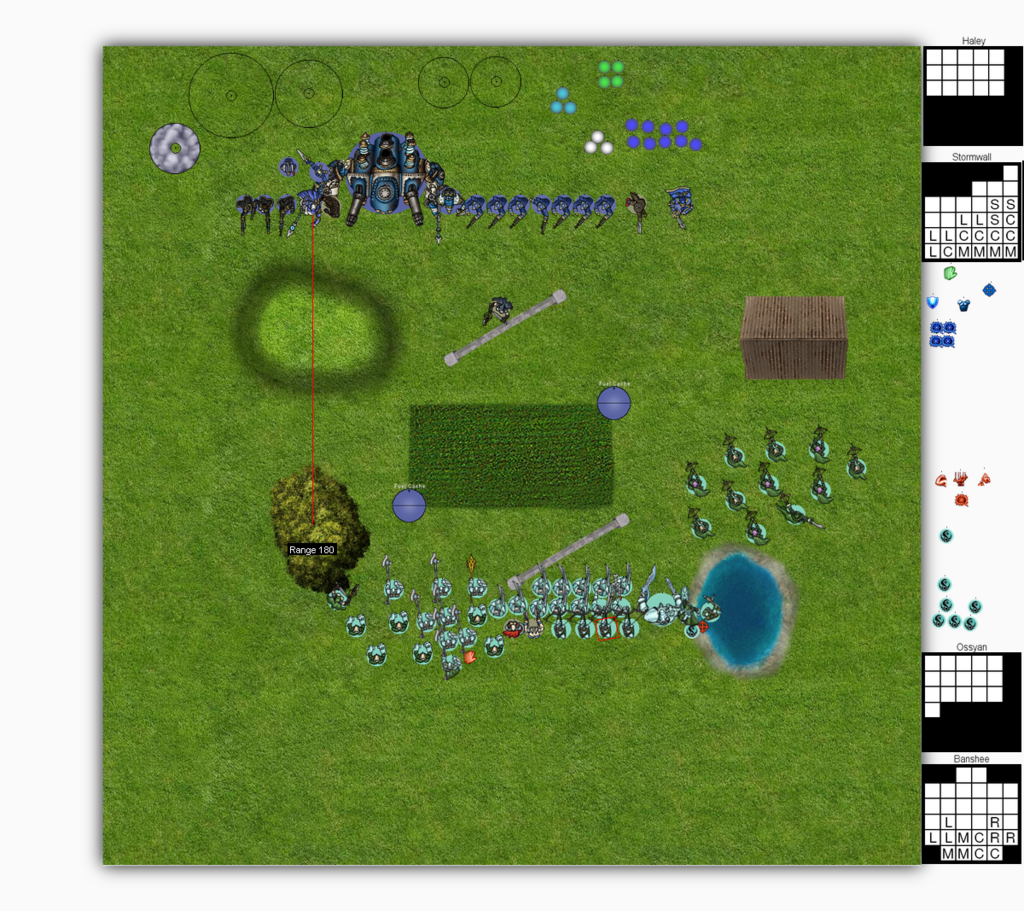
This was Ossyan vs Haley2 on Destruction. Retribution advances MHSF up to abuse Phantom Seeker behind the building. The only problem is that they are a bit vulnerable while getting there. I move up ATGM and snipe out basically half the unit:
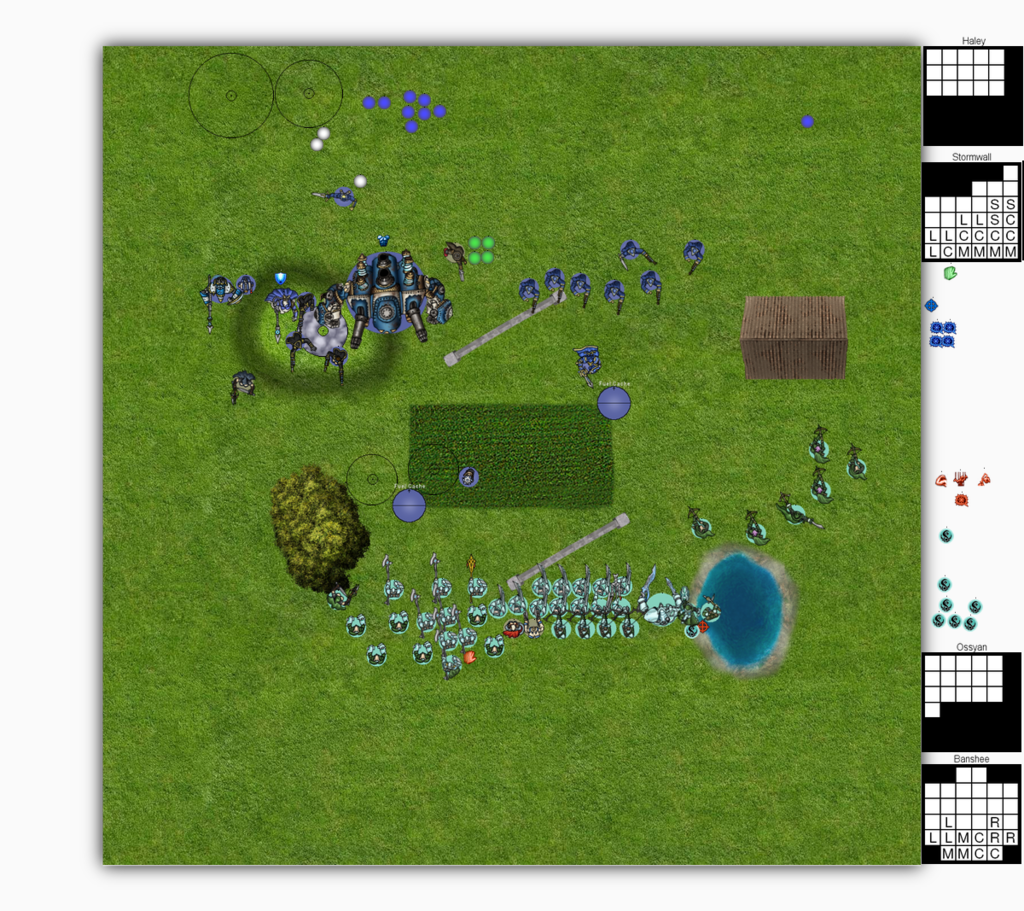 |
| Also note again how my opponent can't really take the right flank away from me and that the ATGM are safe |
---
My next example was my very first game against Butcher3 and one of my first experiences vs Khador in general. This is an interesting example because in this game I didn't support the ATGM properly and I was about to lose control of the game due to pre-maturely feating to help that flank out (which was also vital to Haley's well-being) as some Iron Fang Pikemen were winning big. The state of the game was like this at the start of my third turn (Fire Support, I went first):

Eiryss2 was preventing me from putting focus on the Stormwall. My own Eiryss2 was well within range of landing a shot on Butcher to remove his camp. In hindsight I probably/maybe could've found another way out despite Butcher's feat being intact, but I was short on time. This was my first 50-point tournament (and, as of yet, the only 50-point tournament I've attended) and many of my noob games at the time were won by casting Temporal Acceleration and shooting casters dead with the Stormwall.
So, we went for the assassination run, which seemed like the best choice. I TK'd away his Shield Guard, Time Bombed + TK'd the Butcher. The Black 13th removed a war dog so Eiryss could shoot off his focus and then the fun began. It was an extremely close run and it ended up being down to the last dice roll which I barely made. The Butcher went down and I won.
As the ATGM were all too far away they had to result to Snipe and a couple of them managed to ping wounds which ended up being vital to actually kill him.
---
The next example features a game vs Deneghra1 on Incursion where I went second. I deployed ATGM across his weak-ish flank intending to take control of the right flag with them. Fast forward into the beginning of my T2 and the situation is as follows:
This turn almost played itself: Stormwall is jammed with Satyxis, Bane Knights are up far on the right as are the Nyss on the left. B13th + Gorman will take care of Nyss, Stormwall can shoot and clear off Satyxis and Haley will feat of course. However I have to get control of the right flag to ensure the game and this is where the ATGM come on. With Snipe, I am able to target lots of Bane Knights despite them being highly spread out. I can also start at the models far back to determine who has range for Crit Brutal (I cast deadeye on them). At the end of my T2, things are looking bright for the Swans:
I made a couple of mistakes (this was my first game vs Cryx and my first game of the tournament to boot!) in my T3 but eventually the game boiled down to me rushing for the scenario as I was losing the center. The ATGM scored a couple of points before they were eventually jammed up but they'd achieved their purpose and I took the game 5-0 on control points.
So we've come down to the last attack type. In my opinion, this is the raison d'etre of including this unit in a list. While Crit Brutal relies on Deadeye and Snipe can be dealt with somewhat proactively with arm buffs and keeping your distance, this attack type is nigh impossible to defend against and its uses and angles are too many to list. Long story short, this ability plays to the typical Cygnar strength of scenario play and allows you to focus on one bit at a time:
Thunderbolt
I believe Thunderbolt is a hugely underrated ability and I'm literally -always- looking for ways I can use it to set up favourable positions. When I play without it I feel naked. When I manage to wield this weapon to the best of its ability I feel like it's the most broken thing in the world.
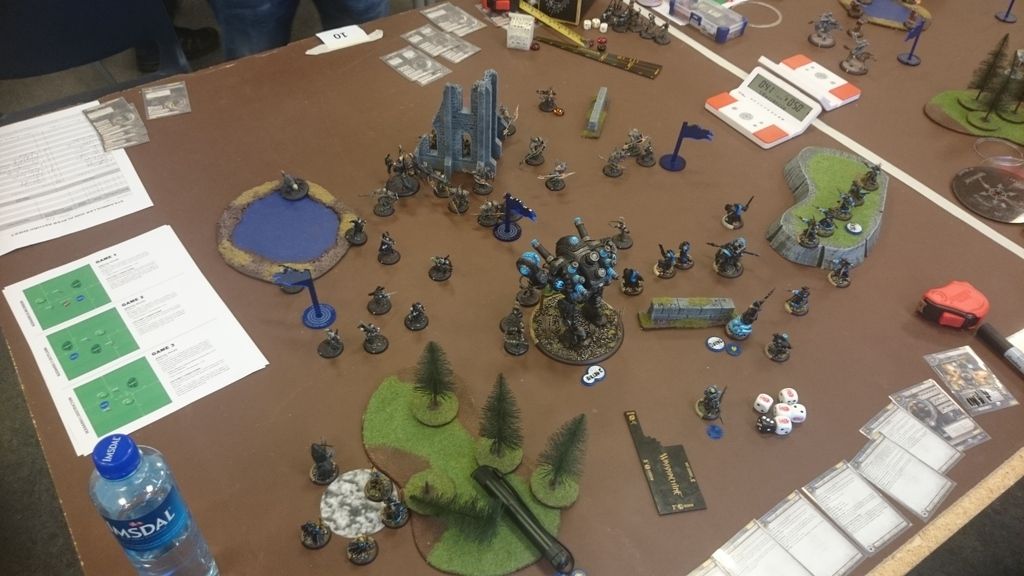
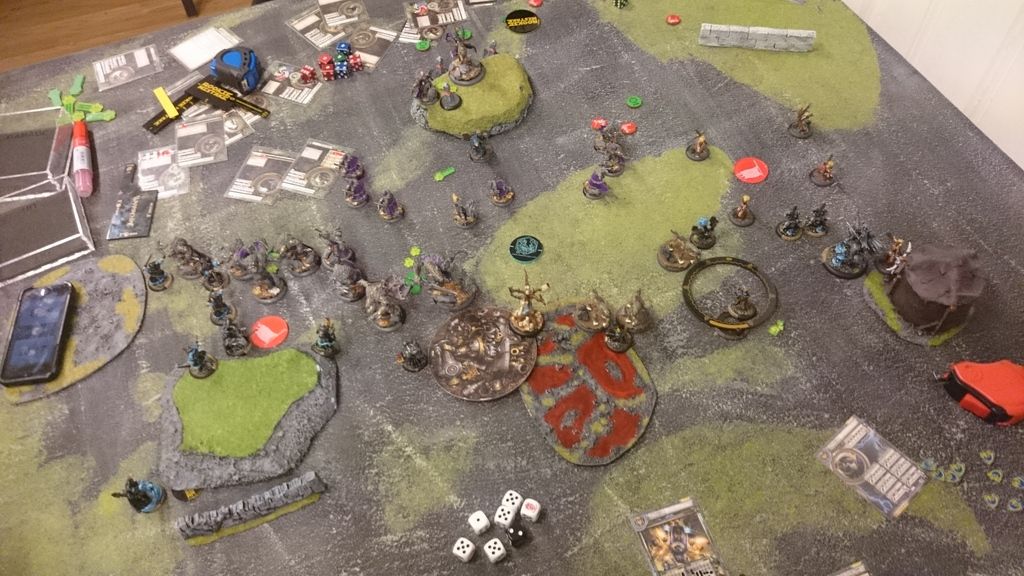
In the following example I am playing Haley2 into Xerxis1 Fist of Halaak tier list. Haley2 is exceptional in the sense that she is almost equally good at assassination, scenario and attrition, depending on how you build her of course. Many games I simply go for attrition but when facing 400 boxes of ARM15+ infantry that simply isn't viable in my experience. In this game I was going as player 2 and we were playing Outflank. The state of the game at the start of my T2 was like this:

Ok so I have to start scoring and I can't really kill off all the models in the right zone. I spend a lot of focus TK-ing things out but there are too many to go around. Finishing off with Thunderbolts allows me to dominate the zone and I also score a couple of knockdowns - meaning those infantry models will be completely useless since I feated.
In Skorne's T3 the models who weren't knocked down went in again and this time I Crit Brutal-ed them to death. Xerxis eventually had to commit and feat to try and deal with the Stormwall but it was so tight there and I had killed off enough Cetratii to survive. In return I killed Xerxis since it was a safer play than trying to clear the zone (largely because he was in the zone and I had to TK twice boosted to get him out) so I won on assassination. However this was something I forced my opponent to do and the ATGM thunderbolting out Incindiarii and Harpoon-boys set it all up with a 2-0 after T2 was over (on a side note Acosta went completely mental in the left zone and wiped out 2 units on his own).
---
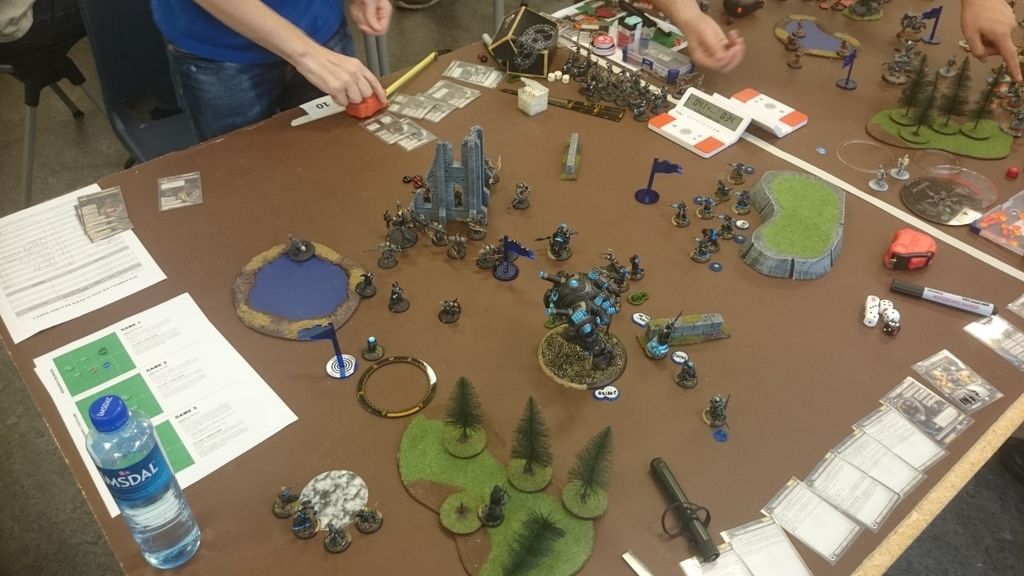
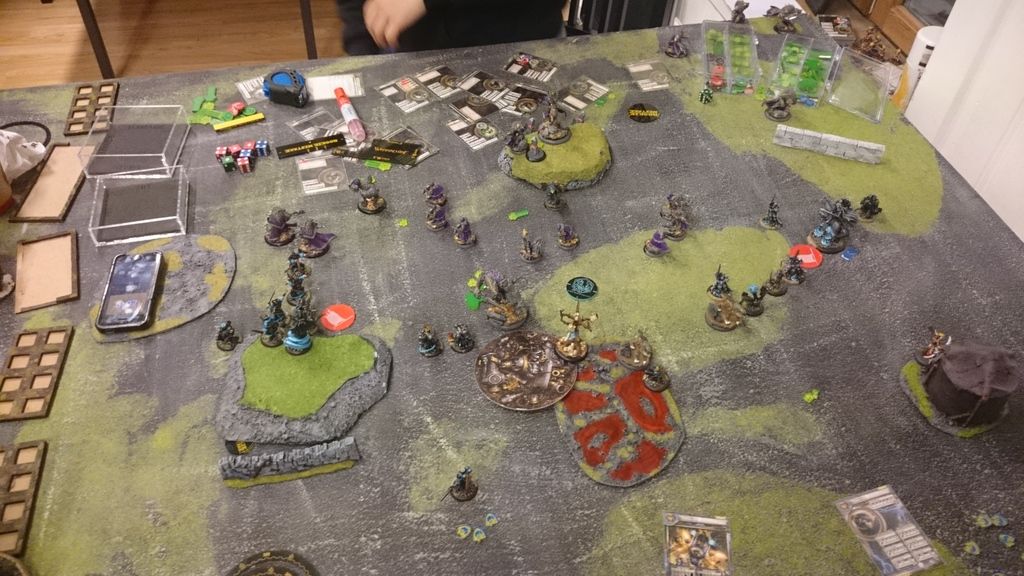
My next example is from my final game of Hexcon where I played Caine2 vs Morghoul1. Morghoul was pre-occupied with ensuring I had no assassination angles and Molik Karn feared dying to my feat as well. As a result, Skorne was left somewhat defensive in a position where my opponent thought he'd given me a catch22: Kill the Titan Gladiator with feat and face the ensuing wrath of Molik Karn or let said Titan Gladiator engage me.

However, I see another angle: By feating out the Titan Gladiator and Thunderbolting the left zone I go to 3-0, meaning he has to contest and survive the right zone in my next turn. Realistically, that is very, very hard for him to do. I set up the ATGM to minimize the distance I have to push the beasts to get them out of the zone and manage to clear it off. Caine feats off the Titan Gladiator and dominates the zone for 3-0:

Skorne decides to go for a long shot assassination on Caine2 which requires, among other things, 15+ on puppet mastered 3d6 and 12+ on 2d6. Although he makes the box cars roll the 15+ fails and I survive. I kill off the elements in the right zone and win the game.
---
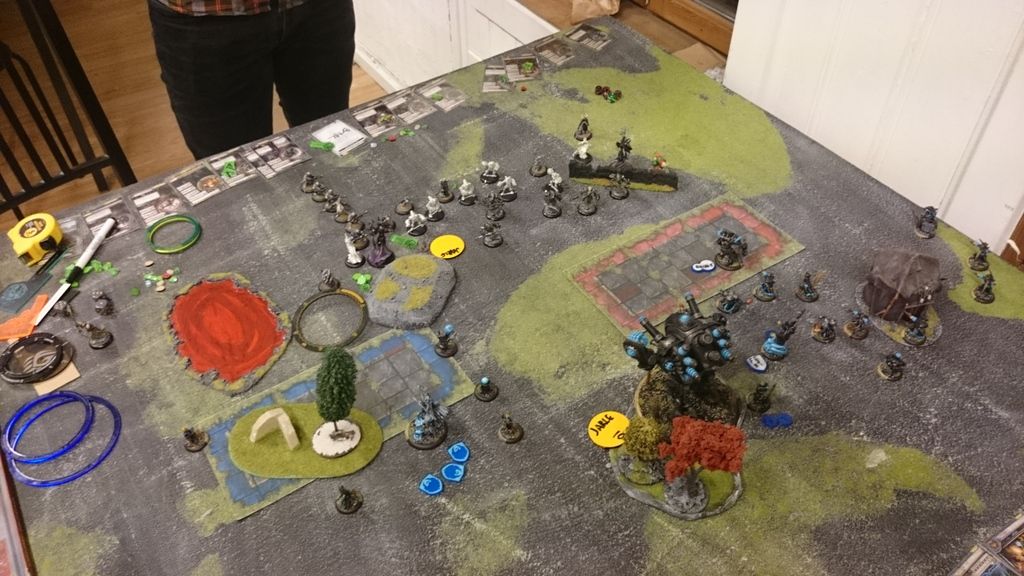
The next example is from a very interesting game I had a couple of months ago against MMM Trollbloods with Jarl. I intend to translate and post this report here in the near future as I don't expect to get as many games in as I usually do (I'm in the process of moving). Anyway, we were playing Outflank and the game quickly turned into one of attrition. I had my hands full dealing with a unit of warders and gatormen on the right flank while time bombing etc to keep Mulg away from the action. I literally had nothing to deal with the second unit of warders and second unit of gatormen which were approaching on my left. Apart from ATGM, of course.

The beauty of Thunderbolt vs non-caster/lock/jack/beast/battle engine is the crit knockdown. Against infantry it is absolutely devastating. In this game I simply had to buy time. Deadeye on ATGM + Thunderbolting Gatormen allowed me to get just this:
---
My last Thunderbolt example is from a very good game against Morvahna2. This is also a report I intend to translate and post here. I've played quite a bit against circle, mostly Krueger2 with some Kromac/Bradigus/Kaya action here and there. This was my first game against Morvahna2 and since we exchanged lists well in advance of the game I had read through what the various elements of her list actually do. I realized that attrition here is likely to be in her favour so yet again I was looking at scenario.
I made a big mistake early on: We were playing Incursion and I completely forgot that there's no extra points for dominating a flag compared to simply controlling it. I spent a lot of focus getting Haley to a flag only to realize I could've simply moved Eiryss2 over there instead. Wow. Anyway, I got points for the flag and Alexia went nuts on the opposite flank, wiping out everything almost single-handedly and eventually sitting on the flag with 2 soul tokens and 6 Thralls or something like that. However, I was short on time -and- Haley was being pressured. My jacks were gone (which is typically bad news for Haley) and the score was "only" 3-0.
With Skinwalkers galore being feated up by Morvahna jamming the left flag this really was a long shot: Alexia had to clear out the right with her Thralls and take the flag while Haley had a ton of models to deal with. The road I opted for was to TK out as many as I could to free up ATGM and Thunderbolt away to push them beyond 4" from the flag. I was a little lucky here as a lot of slightly favoured dice went my way (e.g. getting vital 2" pushes instead of 1") but the angle was real and it paid off:
Thunderbolt is a game changer. It amplifies our existing strengths and takes our scenario abilities to ridiculous levels. The angles with this ability are never-ending, In a way, it feels like an extended version of Haley sort of, which I believe has an umlimited skill cap. If you play ATGM with Caine2 you will also find that Thunderbolt in combat is something out of this world in the right situations.
---
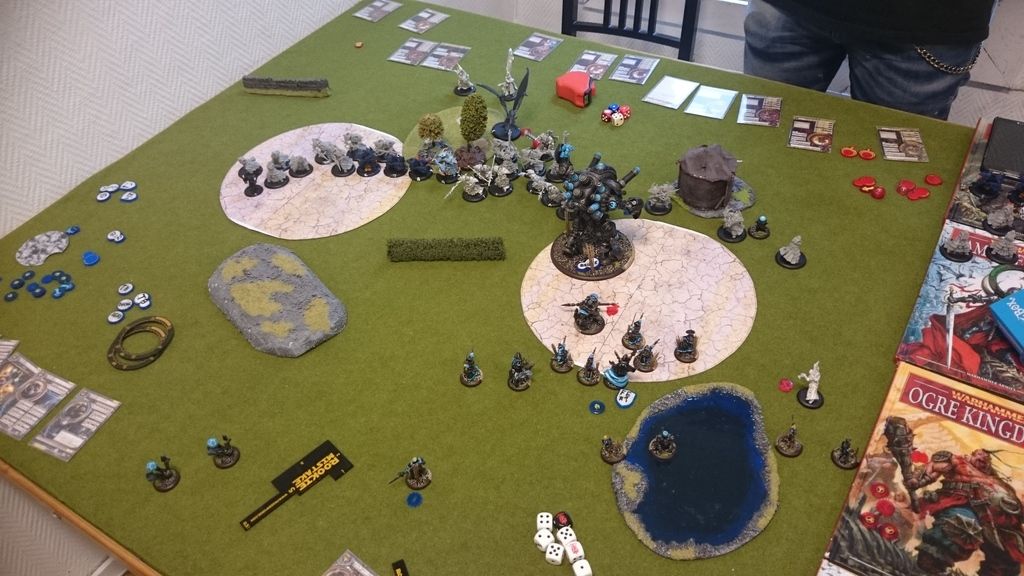
Lastly I would like to point out an option of playing ATGM with Deadeye which isn't really related to any of their abilities but rather an inherent effect of the their high RAT and the spell. Often times people are happy once they've jammed ATGM. Jamming them takes the problem away. The problem is that an aiming ATGM with Deadeye can fairly reliably hit high-def targets - even with the melee +4 DEF bonus! In the following example I was playing vs Asphyxious2 and he sent his Satyxis Raiders to jam my poor ATGM:
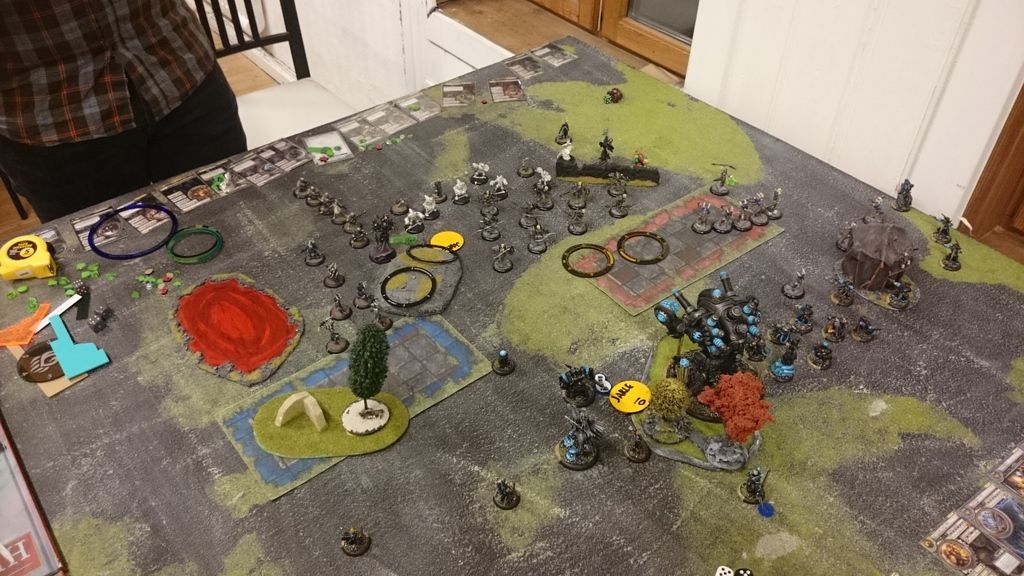 |
| Those are some very dead pirates, they just don't know it yet! |
 |
| In hindsight: A bit of a knee-jerk reaction pre-mature feat. Note to self: Don't auto-feat T2 with Haley2! |
Evaluation
ATGM are a wonderful unit. Their flexibility and synergy with the usual Cygnar tools make them an excellent choice in many lists. Throughout this post I've detailed their strengths and exemplified their A-game. In many matchups they are a solid unit. In many matchups they are a stellar unit. However ATGM are also hard to use right and it's important to remember that they do have a lot of weak matchups. The last part is especially true now that we have somewhat of an ARM-skew meta. Many things in this game cannot be pushed for example and some lists downright don't care at all about what the ATGM do. Furthermore they are a vulnerable unit that can't take a beating what so ever.
In my experience ATGM necessitate a list where they can shine. That means bringing flexible support to ensure they aren't stranded and that you can always adapt them to a situation where the ATGM can be a powerful choice. Among other things I've found util solos like Acosta and Alexia to be excellent value here as they are fairly cheap and often help to counter some of the Pistoleers' weaknesses. One list where I tried to make ATGM work well and simply had to ditch them was with the Stryker1 double Stormwall build. I originally thought that ATGM would be perfect here with Snipe from Stryker and Thunderbolt to help establish control for the Stormwalls but in practice I found that I had to dedicate too much to protecting them and the Stormwalls were getting jammed up anyway (which the ATGM can't do much against without Deadeye).
Conclusion
Learn how to use ATGM and they will be a wonderful unit in the right lists. Make sure you know their weaknesses and what they pair up poorly against. Investing 8 points in a unit is significant and careful consideration should be taken to ensure those 8 points are helping you accomplish what you want to.
Cygnar plays the scenario game extremely well. Thunderbolt helps out amazingly here. When it comes to removing stealth units and solos, ATGM are second to none. When targeting MVP targets such as casters, locks or low-arm beasts for example, Crit Brutal can be valuable if you have a deadeye caster.
For me personally it takes a lot from where I am now until I will consider leaving my ATGM at home in my 50 point main lists. They have proven their place time and again and in my meta with my playstyle they are invaluable.
Man, this was an amazing, detailed looked at the ATGM. Personally, I've been experimenting with the best way to deploy them, and found out that it changes drastically on their intended purpose, With Ecaine, I deploy them on the flank, to "move" screening models via thunderbolt to allow Caine's assassination run. With phaley, I use them up front in a line to push back models or fish for criticals, in that case, Deadeye is critical. Anyway, if you take requests, do the Stormblades next!!
SvarSlettHey Tynianrex, glad you enjoyed the article :) Let me address your feedback:
SvarSlettDeployment varies on role - I've definitely found this as well. I don't think there's a silver bullet. Typically I've either had them as a "flank unit" or "central unit". A short while ago I lost a game vs Cryx basically because my ATGM were horribly out of position. Today I tried sort of letting T1 be their deployment with them swarming around the Stormwall in the actual deployment phase of the game. Take a look at these reports to see exactly what I mean:
http://www.courageofcaspia.com/2015/11/battle-report-7-haley2-vs-asphyxious2-50.html
http://www.courageofcaspia.com/2015/11/prologue-doubly-whammy-against-cryx.html
I think a big part of understanding how to play these guys is to actually pay attention and focus on what their deployment impact is on the game and how this part could've been done better.
Deadeye is absolutely beautiful on these guys. Most of the time I use it to ensure that I actually hit stuff but with a full unit the damage output goes up significantly with Crit brutal and KD chances with Thunderbolt.
Lastly, I don't take requests directly unfortunately but I do heed input. Sadly Stormblade Infantry is a unit I've never played with. I'm focused on preparing for Norwegian Masters now and due to real life I'm pretty much locked into Haley2 and Stryker1 as you can see in the lists section of this blog. Changes will have to small, if any. Furthermore I feel that I need to actually have something to contribute with, which requires extensive experience in relevant matchups and situations. I want to maintain a high level of quality and thoroughness in my posts as the theoretical stuff out there is plentiful but also lacklustre, in my opinion. This takes time. With that said, rest assured that I have bought a unit of Stormblades complete with attachments and that I intend to play Haley3, Stryker2, Stryker3 and Haley2 variants with these after Norwegian Masters in January ;)