mandag 26. september 2016

Battle Report #303: Haley2 vs Butcher3

:: Prologue ::

The second and very last practice game was against my Khador team mate's Butcher3 mad dog spam list. I was eager to put the lessons I learned in my last game vs mad dogs to the test!

:: Lists ::

Cygnar:
Major Victoria Haley - WJ: +25
- Squire - PC: 5
- Stormwall - PC: 39 (Battlegroup Points Used: 25)
- Lightning Pod
- Thorn - PC: 13
- Ironclad - PC: 12
Journeyman Warcaster - PC: 4
- Firefly - PC: 8
Lanyssa Ryssyl, Nyss Sorceress - PC: 3
Ragman - PC: 4
Storm Lances - Leader & 2 Grunts: 12
Opponent:
Kommander Zoktavir, the Butcher Unleashed - WJ: +22 (Stockpile)
- Mad Dog - PC: 7 (Battlegroup Points Used: 7)
- Mad Dog - PC: 7 (Battlegroup Points Used: 1)
- Mad Dog - PC: 7
- Mad Dog - PC: 7
- Mad Dog - PC: 7
- Mad Dog - PC: 7
- Mad Dog - PC: 7
- Mad Dog - PC: 7
- Ruin - PC: 17
Ogrun Bokur (Client: the Butcher)- PC: 5
Orin Midwinter, Rogue Inquisitor - PC: 5

:: Pre-Battle Thoughts & Deployment ::

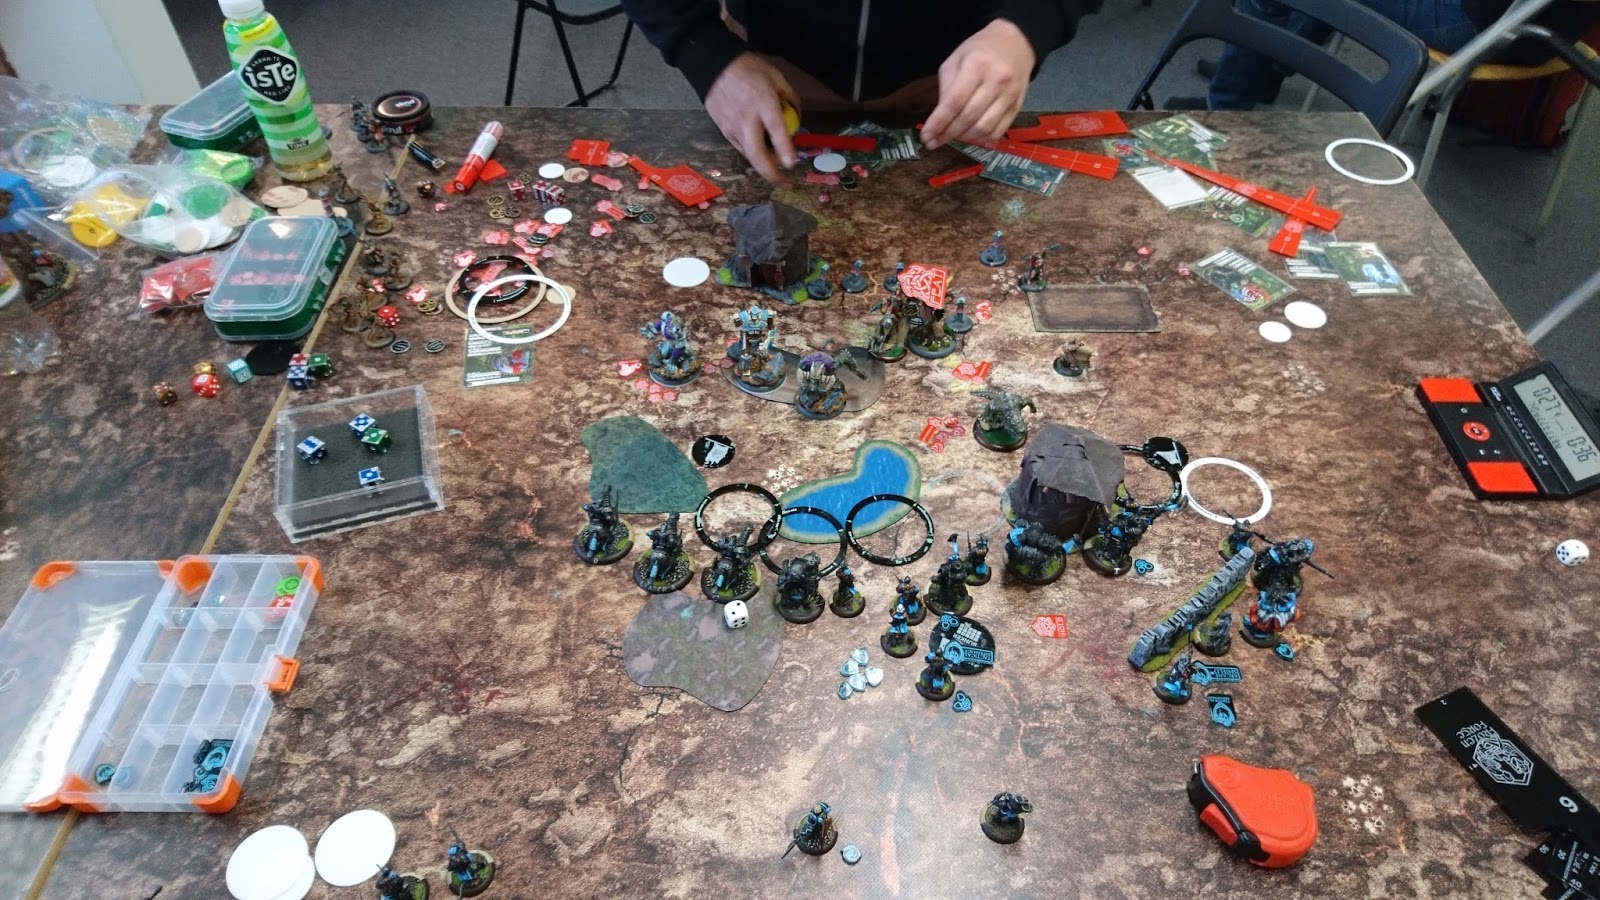
We play Extraction. Now, the clue against Mad Dogs in my experience is to anchor with the wall, flank with both the 'clad and Thorn, hold the other flank with Lances (simply to buy time) and ensure that the Firefly both gets to attack and put its +2 damage to use. I deployed accordingly.


:: Game ::

The Butcher goes first, puts up Silence of Death on Ruin and energizes to put his things up ahead at full speed.


I cannot dominate a Mad Dog and kill it without putting either the Stormwall or Thorn within Ruin's threat range. Instead I TK a Mad Dog, TK Thorn back and kill a dog by way of shooting. The Ironclad sets up out on the flank, the Storm Lances move outside of jam range, Ragman + Lanyssa in place and the Firefly holds the center.


The Mad Dogs do what they do best: Clump way the fuck up to create a fort jackspam.


I have absolutely everything in place to capitalize on my superior power here. It's all a matter of pre-measuring with proxy bases etc to ensure that I get the maximum amount of attacks in. I do manage to land all 4 of my jacks in good positions with Death Field helping me out, the carnage is amazing and Haley covers me with feat.


The Dogs spread out to try and contain my feat. Ruin stays back.


The Ironclad and Thorn clear up my right flank, leaving the Stormwall free to move towards the center. Haley then TKs a dog so that the 'wall can get to ruin. With Ragman and Temporal it kills Ruin and the remaining dogs in its melee range.

Unfortunately I end up making a very unfavourable move with the Firefly...


Butcher can simply charge past the Firefly, cast Impending Doom and kill Haley. Poor placement from me. I concede the game and we reposition the Firefly to block Butcher's charge path. We play it out as if Butcher has to go for attrition. He goes in and manages to grab both the Ironclad and Thorn with Impending Doom. Due to having to cast Silence of Death -and- Energizer this doesn't leave him on a lot of focus though and in this particular game he is unable to kill the Stormwall after some miserable rolls. In any case, I'd already lost.

Sadly, a Loss to the Swans. 

:: Evaluation ::

I am very pleased with how I was able to systematically dismantle the Mad Dogs here. True, they are a different beast to handle without Counter-charge but the idea is sound and the rate at which they died under my feat turn and the following turn says a lot about how effectively I can destroy armour.

The problem with the Butcher is his ability to kill all of my key pieces if I am not very careful with where I place them. I probably could and definitely should have looked for ways to keep the Ironclad safe here. It's easy to get greedy on the dogs. Against Karchev that might be a viable play depending on the positioning of the remaining dogs, but againts Butcher it almost always boils down to my ability to retaliate after his feat.

Although I lost I learned a valuable lesson: Don't let Haley get dragged in!

Battle Report #302: Haley3 vs Ossyan

:: Prologue ::

WTC 2016 was my first WTC experience. Last year I had barely begun playing the game at this point in time. True, Warhammer ETC is by and large the same thing but it's a different system. Anyway, our team was in place by Friday and we had time for a couple of practice games. My captain, playing Retribution, was eager to get Cygnar experience with his Ossyan list so we went at it.

:: Lists ::

Cygnar:
Major Prime Victoria Haley - WJ: +25
- Haley Past
- Haley Future
- Grenadier - PC: 9 (Battlegroup Points Used: 9)
- Thorn - PC: 13 (Battlegroup Points Used: 7)
- Ironclad - PC: 12
Journeyman Warcaster - PC: 4
- Charger - PC: 9
Ragman - PC: 4
Rhupert Carvolo, Piper of Ord - PC: 4
Storm Lances - Leader & 4 Grunts: 20
Trencher Infantry - Leader & 9 Grunts: 16
Opponent:
Lord Arcanist Ossyan - WJ: +28 (Fuel Cache)
- Discordia - PC: 18 (Battlegroup Points Used: 18)
- Imperatus - PC: 22 (Battlegroup Points Used: 10)
Arcanist Mechanik - PC: 2
Ghost Sniper - PC: 3
Mage Hunter Strike Force - Leader & 9 Grunts: 16
- Mage Hunter Strike Force Commander - PC: 4
Mage Hunter Strike Force - Leader & 9 Grunts: 16
- Mage Hunter Strike Force Commander - PC: 4
Stormfall Archers - Leader & 3 Grunts: 9

:: Pre-Battle Thoughts & Deployment ::

This is a matchup I've played a couple of times in the past and although I believe it should be in Retribution's favour it has a tendency not to end up as such. The TL;DR of it is that the MHSF struggle to kill all the Trenchers and following that, the clouds just do a ton of work. We were playing Outlast and Retribution went first.


:: Game ::

This was very much a talk-through-everything-that-happens kind of game. The MHSF spread out with quicken on the right unit. The reasoning here is that if they want to they can dive really deep top of 2 to get to Trenchers or other MVPs.


I proxy base up the Storm Lances behind the cloudwall. Although the traffic jam is very real, I get everything where I want it to be. The Trenchers which do not cloud up dig in.


The two MHSF units commit and take out 7 Trenchers.


I retaliate and wipe out a ton of MHSF. This does commit the Storm Lances but I figure it's worth it because I also move to 2-0 on scenario. One Grenadier runs to contest the left zone.


The Myrmidons commit! Placing themselves in the trench to get DEF boosts, they help clear out the cav. My left Grenadier survives on 1 box (!).


Feat turn! I dominate Imperatus after I send in Thorn in the trench to deny him of the cover bonus. Discordia gets disrupted. Ironclad finishes Imperatus in melee.


The disrupted Discordia fails to do anything about Thorn and my opponent concedes the game.

Victory to the Swans!

:: Evaluation ::

This matchup usually comes down to the same patterns: MHSF go for Trenchers and then die in great numbers to Lances, who in turn are killed by Stormfalls. In this game though my opponent could probably have used Admonition on Imperatus to better effect, at which point I probably will struggle to kill him you know. It is probably the closest game I've had with this matchup. In the end, the surviving Trenchers enable me to put on the scenario pressure which takes the game home.

onsdag 21. september 2016

Battle Report #301: Haley2 vs Gorten

:: Prologue ::

The very, very last practice game before WTC! My bane from Iron Moot, Gorten, is ready to be as problematic as he can be. Let's jump right to it.

:: Lists ::

Cygnar:
Major Victoria Haley - WJ: +25
- Squire - PC: 5
- Stormwall - PC: 39 (Battlegroup Points Used: 25)
- Lightning Pod
- Thorn - PC: 13
- Ironclad - PC: 12
Journeyman Warcaster - PC: 4
- Firefly - PC: 8
Lanyssa Ryssyl, Nyss Sorceress - PC: 3
Ragman - PC: 4
Storm Lances - Leader & 2 Grunts: 12
Opponent:
Gorten Grundback - WJ: +31
- Ghordson Earthbreaker - PC: 38 (Battlegroup Points Used: 31)
- Ghordson Basher - PC: 9
Rorsh - Rorsh & Brine: 15
- Brine
- Battle Boar - PC: 7
Ragman - PC: 4
Thor Steinhammer - PC: 4
Gobber Tinker - PC: 2
Cylena Raefyll & Nyss Hunters - Cylena & 9 Grunts: 19
Lady Aiyana & Master Holt - Lady Aiyana & Master Holt: 8

:: Pre-Battle Thoughts & Deployment ::

A quite different list compared to what I faced last time, but a list with some pretty crazy tricks none the less (protip: Check out the opportunities for slamming and throwing Gorten up the field for crazy feat plays!). I was anxious of how Rock Wall might ruin my chances here and how the feat would force me to play very carefully, but what can you do? After all, it's Haley2, I'm sure there will be angles!

Same map & scenario as last game. My game plan was to play defensively and try and chip away at him, using the feat to get an alpha on anything valuable and try and avoid a devastating feat as best as I could.


:: Game ::

The Mercs run up, Gorten casts his shenanigans-enabling spell and puts up +4 STR on the colossal.


I reply with the e-leap boys protecting the flank vs Nyss, keeping back so as not to die to CRAs. The Stormwall advances almost max. with TA and is used as a shield to cover my other jacks from being feat-fucked. Haley casts Deflection.


My opponent places Rock Wall so that the Stormwall can't charge his colossal. However Gorten himself isn't careful and is within 4" of the edge of the wall. I warn my opponent that he will likely die there but he wants to see it played out. Maybe he thought I was trying to mind-game him, I don't know.


In any case I assault Brine with Lances and the e-leaps clear off a few nyss. The Firefly then boosts a shot to clear off the rest there before Thorn runs up and Haley TKs the Battle Boar away and Gorten into range. I TA the fully-fueled Stormwall, Ragman moves into position with Death Field, Ironclad runs to follow-up, feat is down and even Hunter's mark hits Gorten. Suffice is to say, the angry Stormwall eager for revenge since last time made Gorten regret not putting >4" between himself and Rock Wall.


Victory to the Swans!

:: Evaluation ::

I can see this kind of Gorten list have a lot of potential. It probably needs some tuning but between Rock Wall, anti-KD army-wide and his feat I can see this list mimick Rask's playstyle. Indeed he can even take both the snake and Wrongeye + Snapjaw, which makes for a pretty awesome setup.

In any case my opponent had never played this before and Haley2 is Haley2 so there will always be some angles. The assassination here came a little too easy I'll admit but that's part of learning the game (I remember losing Haley2 a ton of times in my first games and indeed still typically lose on assassination when I do lose).

It feels good to finish the last 2 practice games before WTC with 2 clean wins. I'm as ready as I can be and look forward to an awesome weekend in the Netherlands!


Battle Report #300: Haley3 vs Ossrum

:: Prologue ::

My final practice games before WTC were played today! Two rounds against Mercenaries, one with each of my lists. I really love what PP did with Mercs in Mk. 3 and they are a force to be reckoned with now. As Iron Moot showed I really need more practice against their Rhulic variants in particular as well.

The first matchup was Haley3 vs Ossrum and I was eager to see what she could do against him.

:: Lists ::

Cygnar:
Major Prime Victoria Haley - WJ: +25
- Haley Past
- Haley Future
- Grenadier - PC: 9 (Battlegroup Points Used: 9)
- Thorn - PC: 13 (Battlegroup Points Used: 7)
- Ironclad - PC: 12
Journeyman Warcaster - PC: 4
- Charger - PC: 9
Ragman - PC: 4
Rhupert Carvolo, Piper of Ord - PC: 4
Storm Lances - Leader & 4 Grunts: 20
Trencher Infantry - Leader & 9 Grunts: 16
Opponent:
General Ossrum - WJ: +28
- Reinholdt, Gobber Speculator - PC: 4
- Ghordson Avalancher - PC: 17 (Battlegroup Points Used: 17)
- Wroughthammer Rockram - PC: 14 (Battlegroup Points Used: 11)
- Grundback Gunner - PC: 6
Eiryss, Mage Hunter of Ios - PC: 7
Anastasia di Bray - PC: 3
Taryn di la Rovissi, Llaelese Gun Mage - PC: 5
Ogrun Assault Corps - Leader & 4 Grunts: 16
Horgenhold Artillery Corps - Gunner & 2 Grunts: 6
Herne & Jonne - Herne & Jonne: 5
Horgenhold Artillery Corps - Gunner & 2 Grunts: 6
Lady Aiyana & Master Holt - Lady Aiyana & Master Holt: 8

:: Pre-Battle Thoughts & Deployment ::

The scenario was Take and Hold and my opponent went first. The idea here was to spread out my shooting, have the hitting power converge centrally and get the echoes up the field asap. With the clouds being huge here I was hoping to just counter his moves and force him to commit unfavourably.


:: Game ::

Mercs run up, Snipe on one artillery piece and FFE on the other. Ogruns flank right.


It's Haley3 bottom of 1, nothing new. I ensure that my Grenadiers have Trenchers in base to base to allow full shots before moving Trenchers if he decides to push.


The Ogruns flank -way- right and the jacks kind of just await a move from me. An interesting move sees my opponent run Reinholdt (!) into the clouds to target him with AOEs which then scattered towards me, killing 1 Trencher and knocking another one down (from tough). Reinholdt is indeed kind of useless so an interesting play indeed.


I see no reason to force the issue, I can start pounding him at a distance, I'm up on time and there's no scenario angle for Ossrum. I simply hold my ground and shuffle my things around, dealing significant damage to one of his lights and killing off Anastasia.


What happens now is quite classic from Haley3's perspective: An opponent gets frustrated and pushes without covering himself defensively (in this case: no feat). I think my opponent's list has way too few jacks for being an Ossrum list and indeed Blasters might've been problematic for me to an extent, but given the list he had I would've loved to see the Ogruns for example run in to cause chaos by simply jamming me up under feat turn here with jacks behind. In any case that does not happen and the jacks are kind of exposed.


Feat turn time! I consider going for Ossrum with a Force Hammer assassination run but he's camping 2 and I don't have enough shooting in range to make it a sure kill. I see a very lucrative attrition opening instead so I go for it.

The picture below basically says it all: I kill the 2 lights, most of the Ogruns, one heavy through Domination and Aiyana + Holt with Lances.


Ossrum tries one last move with feat but there are so few models left.


Despite having ARM23 I kill the last heavy and the Mercenaries give up.


Victory to the Swans!

:: Evaluation ::

Interesting game! I can see how Haley3 might easily be the favoured drop into Rhulics, which is awesome considering I'm fairly confident she's the better choice into Cephalyx as well.

This game is a textbook example of how Haley3 plays if your opponent doesn't know her that well or simply doesn't have an answer to her. I would be interested in a more typical Ossrum list with e.g. 7 lights and 2 heavies, perhaps I'll have that chance later at some point.


mandag 19. september 2016

Battle Report #299: Haley3 vs Wurmwood

:: Prologue ::

The last game of the day and lumberjack time again! Different opponent and different list this time, but hey: Wurmwood is Wurmwood!

:: Lists ::

Cygnar:
Major Prime Victoria Haley - WJ: +25
- Haley Past
- Haley Future
- Grenadier - PC: 9 (Battlegroup Points Used: 9)
- Thorn - PC: 13 (Battlegroup Points Used: 7)
- Ironclad - PC: 12
Journeyman Warcaster - PC: 4
- Charger - PC: 9
Ragman - PC: 4
Rhupert Carvolo, Piper of Ord - PC: 4
Storm Lances - Leader & 4 Grunts: 20
Trencher Infantry - Leader & 9 Grunts: 16
Opponent:
Wurmwood, Tree of Fate & Cassius the Oathkeeper - WB: +27
- Wurmwood, Tree of Fate & Cassius the Oathkeeper (Cont.)
- Ghetorix - PC: 21 (Battlegroup Points Used: 21)
- Megalith - PC: 20 (Battlegroup Points Used: 6)
- Pureblood Warpwolf - PC: 17
Blackclad Wayfarer - PC: 4
Wrong Eye - Wrong Eye & Snapjaw: 17
- Snapjaw
Sentry Stone & Mannikins - Leader & 3 Grunts: 5
Shifting Stones - Leader & 2 Grunts: 3
Wolves of Orboros - Leader & 5 Grunts: 7

:: Pre-Battle Thoughts & Deployment ::

I insist on going second since I need to understand how that shapes the dynamics of the matchup. Yet again we play Extraction. My plan here is to form a symmetric line and try and meet him head on to deny scenario angles and work the long game.


:: Game ::

Circle walks up cautiously and place sentries, cloud and Growth to LOS-block me. Perhaps overly cautious considering I can rarely afford to get a lot of work done top of 1 but then again those pieces are squishy so there's that.

In return I make a very long cloudwall and simply position to deny said scenario angles.


Cassius runs into clouds, Stranglehold on Ironclad and port out. Mannikins try and get work done. They don't.


Snapjaw is contesting the right flag and I have no way of getting to him so that's out of the question. However I have an interesting play here: By sending a couple of Lances into the left Sentry Stone I can take it out and reform onto the flag for a scenario lead while still contesting. I can also fairly safely shoot out the other stone with Future and removing them both is a big deal here for sure. I make the play and go to 1-0.


Wurmwood's feat is incoming and I know it. By having the Ironclad in cover I was hoping he wouldn't dare to make the Stranglehold play as it's a 50/50 to hit and a significant investment. He goes for it and makes the hit, sad face is sad. The heavies combine to kill the Lances on the left but no scenario points are scored. On the right, Snapjaw moves up to contest, as does the Blackclad.


This turn is crucial and unfortunately the house on our right flank is a complete mess. We end up removing it altogether but so many things have been nudged around. The idea is to have the Grenadiers both go in on full focus to kill Snapjaw with Ghost Walk and Death Field and Thorn in reserve in case they would not be enough. The Trenchers move up and cloud again, with the 2 on the right flank trying to CRA the Blackclad, which fails. I forget to move these 2 away and that is crucial because Thorn now cannot reach the Blackclad. This is so sad because the Grenadiers do indeed kill Snapjaw. This leaves Thorn doing next to nothing as he simply positions himself for the next turn instead. The Ironclad was meant to have cover here but didn't get it because of how we messed up the terrain piece play. In any case I should've shielded him differently with clouds.

I make a big mistake with Lances. They should have moved up aggressively here because at this point in time I can present too many targets for him to handle, but with the Lances not putting the pressure on he can instead focus on a few key pieces at a time.


The heavies clear out the Grenadiers. Stranglehold on Ironclad again. Point scored on the left flag, 1-0.


I have to try and kill both Ghetorix and Megalith. The Charger is able to move up and put his shots into Wrongeye, hopefully taking away Starcrossed. I fail to kill him though and this is just sadface. Ragman with Death Field, Past, a fully fueled Thorn and Trenchers should be enough to take out at least one heavy, right? Wrong. Megalith survives on like 1 box I think but it was my mistake because I didn't pre-measure to ensure Thorn could get into the thick of it. Having Megalith alive is a huge, huge setback because Undergrowth is such a big animus here. The Lances move up to do what they should've done last turn: Be a problem for the Pureblood.


Megalith kills the echoes alone, the Blackclad (which Prime failed to kill) takes out a ton of infantry and Ghetorix kills Thorn. I didn't ensure my middle Lance was within 4" of the left flag so my opponent moves to 3-1. Stranglehold this time fails to hurt the Ironclad.


I can try and play the clock but scenario is running away from me and without Future alive I can't get the Ironclad into Megalith with Strange Growth blocking me out. The Lances try and kill Ghetorix and damage the Pureblood but this fails.

My opponent ports Megalith up to my objective and it gets destroyed. The Pureblood kills a Lance with Ghetorix killing the other and my opponent wins with 68 seconds (!) left on his clock.

Sadly, a Loss to the Swans. 

:: Evaluation ::

What a game! A very interesting game swinging back and forth. Easily the most interesting game I've played since my Haley3 vs Haley2 match last tournament.

My main take away here is that I need to consider either dropping clouds lower or having a second layer. Losing Ragman or having the Ironclad Strangleheld really needs to cost my opponent a lot. In this game he could control the Ironclad easily and that ultimately lost me the game. If the clad had been threatening Snapjaw on his feat turn I could likely have cleared out -and- scored on the right flag. That would have been disastrous since all the heavies were committed on the left flank.

Again, as in the Vayl2 game, I think my early game is solid, very few things I would've changed here. Getting out both Stones early is amazing and I even took a scenario lead while offering 0 openings on his feat turn CP-wise.

I think this game shows just how close this matchup is. This list is a lot better for fighting me though than the one I faced game 1 yesterday. Starcrossed is amazing with Circle heavies and my God, that Megalith was MVP for sure! A truly great game and tons of learning points.

Battle Report #298: Haley3 vs Vayl2

:: Prologue ::

Following a game vs Wurmwood I was up against Vayl2. I believe Haley3 is up in this matchup but for the first time I faced what I believe is a -very- solid Vayl2 list in the hands of a very skilled player. Let's get to it!

:: Lists ::

Cygnar:
Major Prime Victoria Haley - WJ: +25
- Haley Past
- Haley Future
- Grenadier - PC: 9 (Battlegroup Points Used: 9)
- Thorn - PC: 13 (Battlegroup Points Used: 7)
- Ironclad - PC: 12
Journeyman Warcaster - PC: 4
- Charger - PC: 9
Ragman - PC: 4
Rhupert Carvolo, Piper of Ord - PC: 4
Storm Lances - Leader & 4 Grunts: 20
Trencher Infantry - Leader & 9 Grunts: 16
Opponent:
Vayl, Consul of Everblight - WB: +28
- Nephilim Bolt Thrower - PC: 11 (Battlegroup Points Used: 11)
- Ravagore - PC: 19 (Battlegroup Points Used: 17)
- Seraph - PC: 14
- Typhon - PC: 24
Blighted Nyss Shepherd - PC: 1
Blackfrost Shard - Sevryn, Rhylyss & Vysarr: 9
Blighted Nyss Raptors - Leader & 4 Grunts: 18
Hellmouth - Hellmouth & 3 Tentacles: 6

:: Pre-Battle Thoughts & Deployment ::

Same map & scenario. Legion moves first. I pick a side which allows me to place Prime outside of Vayl's top of 1 threat and still move into Rubble for perma-cover bottom of 1. If my opponent for some reason wanted to skew on the opposite side I had a fence on my right. He did not do so however and I went for the original plan.


:: Game ::

Legion move out and the left Grenadier tanks a Chasten to the face. Luckily no significant damage done.


I move out and get as many models in the DEF-bubble as I can. A grenadier and the Charger takes out 2 tentacles.


Vayl makes a very interesting play: She feats for the Lances! Given the odds for spell-assassinating me when I have a piece of Rubble I think this is a decent play. He does manage to get all Lances but it exposes the Ravagore, the Seraph, to an extent the Typhon and the Raptors.


Typhon in the cloud is kind of iffy to deal with by ways of shooting. DEF15 is simply too much and he has his animus up. I get too greedy here unfortunately and go for a play to kill all 3 heavies. I mess up with counting my focus and some poor dice rolls ensure I hardly even scratch the Typhon whereas the Seraph is still more than a little alive.

The play I go for is Ironclad Ghost Walk + full focus -> charge Ravagore, Past Force Hammer Typhon and then move out.


The problem with this play, besides being too greedy, is that I have given Legion exactly what they need: Typhon can charge Future and get 3 blasts onto Prime. He can also probably strip me of arcane shield and possibly even land Kiss since Future is so exposed. My opponent does not know the rules interactions well enough so he doesn't play this run optimally, but his dice are kind enough to him (he needed a 15+ on the last boosted damage roll to kill me, which he got on the spot) to kill Prime and teach me a lesson.

Sadly, a Loss to the Swans.

:: Evaluation ::

I think my early game play is solid, but the feat turn was way too greedy. I just need to keep Prime alive. If I can get both the Ravagore and the Seraph while doing so I'm pretty sure I'm up. There are too many models left with too high defense and too many boxes for him to deal with effectively and the scenario is dead.

This loss does serve to show just how lethal Vayl2 is though. Haley3 is incredibly hard to assassinate at a distance unless you can knock her down, but Vayl2 has some next-level angles for sure and this list has everything it needs to land them while still having a solid attrition game.

A very interesting game and although crazy dice ensured the loss, I did deserve it following my feat turn play. With optimal play from my opponent the run is probably around 50-60% I think, perhaps even more.

Battle Report #297: Haley3 vs Wurmwood

:: Prologue ::

You can't have competitive ambitions these days and not practice being a lumberjack. While I am confident in Haley3's ability to give the old Tree a good game, I am not confident in my ability to ensure that she does do. Yesterday I played a few games and the first one was against Wurmwood!

:: Lists ::

Cygnar:
Major Prime Victoria Haley - WJ: +25
- Haley Past
- Haley Future
- Grenadier - PC: 9 (Battlegroup Points Used: 9)
- Thorn - PC: 13 (Battlegroup Points Used: 7)
- Ironclad - PC: 12
Journeyman Warcaster - PC: 4
- Charger - PC: 9
Ragman - PC: 4
Rhupert Carvolo, Piper of Ord - PC: 4
Storm Lances - Leader & 4 Grunts: 20
Trencher Infantry - Leader & 9 Grunts: 16
Opponent:
Wurmwood, Tree of Fate & Cassius the Oathkeeper - WB: +27
- Wurmwood, Tree of Fate & Cassius the Oathkeeper (Cont.)
- Feral Warpwolf - PC: 18 (Battlegroup Points Used: 18)
- Megalith - PC: 20 (Battlegroup Points Used: 9)
- Pureblood Warpwolf - PC: 17
Gallows Grove - PC: 2
Lanyssa Ryssyl, Nyss Sorceress - PC: 3
War Wolf - PC: 2
War Wolf - PC: 2
Reeves of Orboros - Leader & 9 Grunts: 16
- Reeve of Orboros Chieftain & Standard - Chieftain & Standard: 4
Sentry Stone & Mannikins - Leader & 3 Grunts: 5
Shifting Stones - Leader & 2 Grunts: 3
Farrow Bone Grinders - Leader & 3 Grunts: 5

:: Pre-Battle Thoughts & Deployment ::

The scenario is extraction and I move first. My plan for this game is to move up aggressively as Wurmwood can rarely afford to get a lot of work done early on and work my way from there, gradually establishing control with the clouds and ranged superiority. Getting echoes in position is crucial as they threaten Sentry Stones early on and I also need my jacks up center.


:: Game ::

Lances swing right, jacks go center and Haley slightly to the left. Distortion and Supremacy are up.


Deliberating for some time, my opponent decides to go hyper-aggressive himself by feating bottom of 1 to claim table space. Considering his Reeves are kind of in a shitty spot because of my Storm Lances I think this is an ok move, but I fear for Wurmwood's ability to attrition well given that he blows his feat this early. In any case it is what it is. Curse of Shadows is cast on Lances.


There's no scenario pressure yet and no exposed high value models so I simply shuffle my lines. I make a big mistake on the left flank as Past moves up to be 7.1" away from the Feral, forgetting he could warp strength. I was hoping he would have to trample, and although he can likely kill Past while doing so that's a good trade for me as it pretty much costs him the flank.


Circle strikes! The Feral kills Past but doesn't manage to deal enough damage to the Grenadier there. In the center, Megalith is ported up to cast Undergrowth and bash the other Grenadier and some Trenchers. The Mannikins struggle with the Trenchers in the middle because of solid DEF-bonuses and too many targets and the Reeves decide to go for the Lances instead, leaving but a single one alive. In the middle of it all I end up having a Trencher contesting the right flag -and- another one contesting the left flag. Perfect!


I can place Thorn so that he can apply Death Field to both the Feral and Megalith. I look for openings to kill Megalith because my Ironclad is just within 9" of the Pureblood. I decide to go for the safer play and simply kill Feral + Megalith instead, leaving the Pureblood alone. I have to feat this turn to get the focus up all around, which is kind of sad seeing as Past isn't up but hey, sometimes that happens. Megalith is significantly overkilled and I regret not looking for openings to kill him without the Ironclad. The Cloudwall is still up, making life rough for Reeves.


The situation is rather desperate for my opponent. I am significantly up on attrition here, he has no good angles for echoes and even if the Pureblood gets the Ironclad it's likely not enough. He is also short on time so instead the choice is made to go for assassination: The Pureblood can throw Thorn onto Prime without declaring a target (my mistake for not blocking the gap, excellent spot from him!). He does do so and Mannikins + Wurmwood follow up with all their hurt. Luckily for me ARM17 and 2 camp is enough to keep her alive on 7 or so boxes!

Victory to the Swans!

:: Evaluation ::

I feel like I played a solid game here. I managed to do what Haley3 does so well: Draw out inefficient alphas which force trades that are favourable to me. From the early aggression to the cloudwall keeping Reeves from doing much at all, Wurmwood just couldn't find openings.

Giving up Past so easily was a mistake. I can't remember what damage was done to the Grenadier but I think he lost his cortex, which was unnecessary. The correct play here is probably to contest with the Grenadier and possibly another model, spaced out so that the Feral couldn't have killed both. Going to 2-0 might be a solid play from Wurmwood here.

The assassination angle was very well spotted. As those of you who read this blog frequently know, I'm a sucker for throws. I need to spot the angles against me as well and this one would've been fairly easy to protect against.